Roblox bot to collect coins!
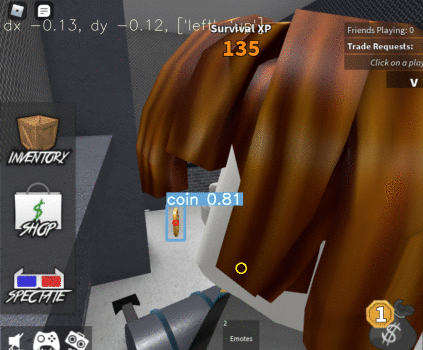
Table of Contents
- Setting up the hooks
- First Attempt: Keypoint matching
- Second Attempt: Template matching
- Third attempt: Yolo Deep neural network detector
- Conclusing thoughts
- Appendix: Train your own bot
Roblox is a multi-player online game plateform that hosts over 40 millions games made by users. Murder Mystery 2 is one of its most popular games.
My son is into this game and asked me if I could write a bot to automatically collect coins. I thought it was pretty cool idea, and is pretty doable given the recent advance in machine learning.
The final performance of each model is:
| Methold | Coins collected per hour |
|---|---|
| Template matching | 40-50 |
| Yolov5 - run to coins | 90-110 |
| Yolov5 - run to coins and run away from other players | 200-230 |
Not too shabby! A human player can collect about 500 coins per hour so the model still have room for improvement.
Setting up the hooks
The first task is to capture the Roblox window as streaming images. That was done by bringing the window to foreground and capturing a partial screenshot using the pywin32 package. The image streaming was implemented as a background processs so that it won’t be affected by the timing of image processing and policy action.
The next step is to find a way to control the Roblox character. For some reasons, many keyboard control packages didn’t work with Roblox. The only package I found worked was AutoHotkey for python (ahk). 1
An interesting naunce is DPI scaling in Windows can cause the captured window area incorrect. The artifact can be resolved by SetProcessDPIAware() function in ctype package. 2
First Attempt: Keypoint matching
I know neural network is all the rage. But as a rule, I always start with something simplier to see if that works. After some research, I decided to use SIFT algorithm to find and match keypoints based on a templates image of gold coin. The algorithm is robust against scale and perspective change. It should serve as a good starting point.
I found the keypoints of the coin template and game play, followed by filtering and matching the keypoints between the two.

However, there were too many false positives and negatives no matter how I tune the parameters. The diverse perspective and lightning change in the scenes seemed to mess up the detection.
Second Attempt: Template matching
Coin detection
To deal with the scale and perspective change, I detected to try something even simpler: template matching. Basically the algorithm scans a coin template across the image to see if there are any matches. However, there are few issues:
-
The coins are spinning, so instead of one template, I need multiples to capture different views during the spin. This is dealt with using a series of templates.

-
Since this is a 3D game, perspectives of the coins can change depending on the viewing angle. I ended up using multi-scale template matching. It does slow down the detection significantly. I compensated by reducing the image size.
-
The scene are simply too rich with variety of background and players with different costumes. It’s easy to have false positives. I decided to do some feature engineering and apply a yellow filter 3 before template matching, so that I only need to deal with anything that looks yellow.
The resulting detector kind of works. It detects ~50% of coins and can have many false positives, depending on how yellow the scenes are…
Policy actions
With the coin detector kind of working, it’s time to tell the Roblox character what to do with the information. Again, the state-of-the-art technique is reinforcement learning methods, such as A3C. But I always start with simpler methods. Perhaps this can serve as a baseline performance.
I simply divide the screen into 9 regions and perform the movement like below if a coin falls in one region.
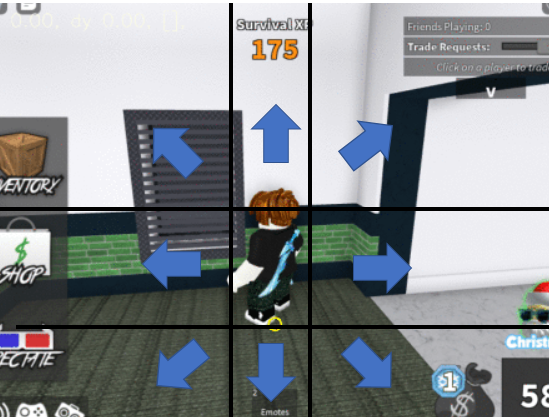
When there are no coins, the character would perform random actions of jump, movement and turns. Turns are important as it helps the bot to escape from trapping when facing a wall.
I found adding random jumps to all movements is important. Sometimes the coin are not at the same level of the character and it needs a jump to get it. Other times it helps the character to get unstuck.
Codes
The bot is in the RoboxBot repository, in bots/mm2_tm_coin_collector/ directory.
Third attempt: Yolo Deep neural network detector
Coin detection
With all the recent advances of object detection by neural networks, I was curious how much better they are compared to the traditional methods I have tried. After some research, I decided to use Yolov5, a state-of-art and light weight object detector based on deep neurral network. In my application, speed is important as I need to proces video streams of minimum ~10 frames per second. Each ~0.1 second budget not only includes object detection, but also image capture and policy action.
The first task is to collect training images. This can be done by saving the video stream from the game.
The second task is to label each image to tell where the coins are. I used OpenLabeling, a lightweight Python based image labeling tool, and end up making some modification including speeding up and adding functionality to meet my specific need. (I was intimated by the mainstream tools with hundreds of features like web-based collaborative labeling that I don’t need.)
Finally, the images and labels are fed into the Yolo model for traing. The detailed instruction of training a Yolo detector can be found here.
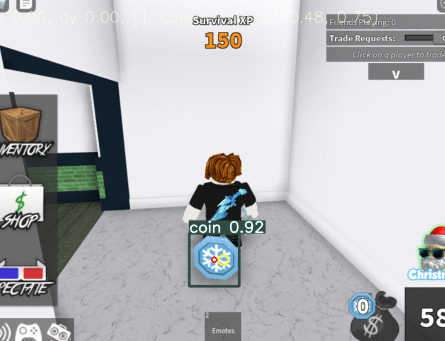
I was pleasantly surprised that the detector works so well. It’s fast and accurate. With 200 epoches of training on ~1000 images, it captures >90% of the coins with very few false positives. The performance is about 100 - 150 coins per hour.
Here are some clips from the trained bot.
The bot is in the RoboxBot repository, in bots/mm2_yolo_coin_collector/ directory. It can be run by
cd bots/mm2_yolo_coin_collector/
python main.py --weights weights/yolo_coin_m_v3.pt
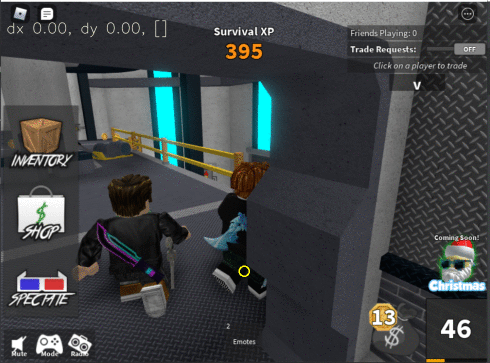
Detecting other players
In Murder Mystery 2, you are either a murder, sheriff or innocent. In majority of time, it is beneficial to avoid getting killed if your goal is to collect coins. So I trained a Yolo detector to detect both coins and people. The policy is if I see other players, there is a certain probability I would run away to avoid getting killed. The change improves performance to 180-250 coins/hour.
Here are some clips from the trained bot.
The bot with player detection can be run by
cd bots/mm2_yolo_coin_collector/
python main.py --weights weights/yolo_coin_person_m_v2.pt
Conclusing thoughts
In this work, I see several pros and cons of using deep neural networks
- You have to have the right hardware such as a decent GPU and CPU to use neural network, whereas older methods are almost always CPU based.
- In traditional methods, you spend most time in exploratory feature engineering, whereas in neural network you spend most time in data collection and labeling.
- The advantage of neural network are:
- The return is certain: the more data and label, the better the performance. Whereas the time in feature engineering can be wasted if a particular approach doesn’t work out.
- The labor intensive part is low skill. I asked my kids to label the images.
It would be fun to see the performance of replacing the feature-based policy with reinforcement learning. One concern is the scenes are quite complex. I am not sure if I have the right hardware to train a big enough model. But it would be a good test of how practical reinforcement learning is
Appendix: Train your own bot
The following instructions are for making and training a new Yolo-based bot for a new Roblox game. In the example below, I am making a new bot called mm2_yolo_bot2
Step 1: Make a new bot
Make a new bot in your local RobloxBot repository.
cd bots
cp -r mm2_yolo_coin_collector mm2_yolo_bot2
Step 2: Collect training images
Start a Roblox game.
Start the new bot and save the video stream:
cd bots/mm2_yolo_bot2
python main.py --save-stream
The saved images are in bots/mm2_yolo_bot2/images.
Step 3: Label images
Label images with OpenLabeling tool. Clone the repository:
git clone https://github.com/ctawong/OpenLabeling.git
Put training images in main/input folder.
Edit main/class_list.txt to add or remove classes.
Run the codes and label the objects
  cd main
  python main.py
Controls:
- a: previous image
- d: next image
- w: next label
- s: previous label
- x: delete image
The output Yolo annotation files will be in output.
Step 4: Train the Yolo model
Clone the repository Yolov5 for Murder Mystery 2.
The configuration file is data/mm2.yaml. Modify the number of class and class names according to what your traning data.
Put both the training images and Yolo darknet annotation files in the directory mm2_images/train/
Train model by
python train.py --img 640 --batch 8 --epochs 200 --data mm2.yaml --weights yolov5m.pt
yolov5m.pt is the medium-sized model. Smaller and larger models are also available.
The trained model can be found under runs/train/. Copy the best.pt file to your bot directory under weights/
Step 5: Modify your policy
All policy actions are implemented in policy.py in your bot directory. Add/remove classes and modify the actions accordingly.
A more detailed instruction to train custom data can be found here.
Step 6: Run your bot!
Start the Roblox game. Run your bot by
cd bots/mm2_yolo_bot2
python main.py --weights weights/best.pt